Wednesday, December 4, 2013

Classy Doily ornament


I really like how you can take a single image and cut each layer out to make a 3D shape.  I have in the way past purchased wood and rubber stamps with that in mind but have never actually made any until now.  This is such a sparkly and shiny ornament, thanks to clear embossing powder, sparkles and Glitz Glitter gel in red and silver.  Unfortunately both the embossing powder and Glitter Gel are retiring from the CTMH line January 31st.  The clear embossing powder is already sold out.  I am seriously hoping it will return in different packaging in the new Idea Book.

Supplies:
B1424 Classy Doily stamp set
X7176B Sparkle & Shine Paper Packet
Black Pigment Ink (included in the Basic mini pigment pad set Z2503)
Juniper and Ruby cardstock
Z1484 Red Glitz Glitter gel
Z1482 Silver Glitz Glitter gel
Z1263 Bitty Sparkles
a misc. red sparkle and lots of 3-D foam tape

The two largest layers are from a coordinating cut on the Artiste Cricut cartridge, Z1790, the rest of the layers were cut using our Micro-Tip Scissors, which sadly are also retiring (but the Non-Stick version will continue.)

Tuesday, October 15, 2013

Huntington mini cards

I chose to do mini cards in a swap using the lovely Huntington paper pack.  For some reason, I was feeling especially creative and my ideas turned very nicely into some really cute projects.

It is a little difficult to see but I used the hexagonal stitch pattern from our new Stitch Guide Z1852 to make a double row of holes around a Cricut-cut hexagon on this first 3x3 card.  Another consultant had said that this size card works well as a little lunchbox 'love' so I kept this in mind for this project.

This next one uses what is called a Joy-Luck pattern but in a miniature size.  The Sparkle in the corner keeps the first flap from opening until you want to see the rest of the card.


I wanted to try the Stair Step style card for my 3rd mini and was pleased to have this adorable little card evolve.  It uses Cricut cuts from the Artiste and Art Philosophy cartridge.  I think it would make a beautiful place card for any Thanksgiving dinner.


My next swap is with the Sparkle & Shine papers.  I hope the Creative juices are still flowing freely as I work on those.

Sunday, October 13, 2013

After the Crop

By the time this posts, the crop which I am attending as a vendor will be done.  One of the centerpieces for my display will be this wonderful Advent Calendar.  If is made using our Designed Decor Black Frame which has five wires strung across the opening of a lovely black wooden frame.  A similar Advent Calendar is in the artwork in CTMH's Holidays from the Heart Gift Guide, a limited time mini catalog featuring a new paper pack, Sparkle & Shine and new Christmas stamps sets as well as other new products.  I knew that I wanted to recreate one for myself and to show others.  I still want to upscale the embellishment on the title banner but for now it is done.  I plan on letting each customer at the crop select one of the little fry boxes, and awarding a prize based on the number as well as the Hershey Miniature candy bar that will be in each box. This project made quite a hit at our GottaStamp unit meeting with several people trying to claim it as their own.  It came back home with ME, though.

Supplies used:
Z1880 Designed Decor Black Frame
Z1815 Mini Clothes Pins
Z1790 Cricut Artiste Collection
X7176B Sparkle & Shine Paper Packet
D1552 Magical Days Stamp Set

Friday, October 11, 2013

As I promised a few days ago, here are the October projects for my Assisted Living group.  Well, sort of.  I did not use CTMH patterned paper for my ladies but I did recreate the cards in retired CTMH paper to share at my CTMH GottaStamp Crew unit meeting.  These are the CTMH versions.
This first one uses paper from the Wonderland kit.  The cute deer is from the retired Santa's List D1383, but the fancy swirl is available now - Swirls Around D1551.


This Autumn card uses our cardstock in Barn Red, Honey, and Goldrush, along with a bit of the retired paper packet, Dreaming, to really make that scalloped border show.  And of course, the scallop was done with our new scallop punch Z1851.


The highlight of the class was this adorable Witch's Hat mobile.  My ladies made it with a white ghost, but the ghost is from a non-CTMH Cricut cartridge so I changed it up to a black cat and changed the spider to purple to keep it all to CTMH cartridges.  I used Art Philosophy, Artiste and Artbooking - all three of our cartridges.  Every one of my ladies really liked how it turned out and I helped a couple of them pick a nice spot to display it near their doors.

Sunday, August 25, 2013

Artbooking in August 8/26


Welcome to week 4, the last week of Artbooking in August.  Not only does that mean our blog hop is drawing to a close, but the month of August is just about gone, too.  It is almost trite to say it, but where has the time flown? 

If you came here from Lisa's blog,  you are on the right track.   
If you get lost, there is a complete list of participants on Adeline's blog.

Last week there were a lot of examples using the Halloween mini-album, including mine.  Here is another simple use for those Halloween pages.  I cut the desired page at 3 inches and used my Cropodile to enlarge the holes.  Some simple embellishments and they were ready to be slipped on some sweet treats.  I used a bit of Scotch tape to secure them.  


Now hop on over to  Heather's blog to see some more Artbooking goodies.


Sunday, August 18, 2013

Artbooking in August 8/19


Welcome to week 3 of the Artbooking in August blog hop.  Whew, we have had a lot of wonderful, inspiring projects in the past 2 weeks and this week is just adding to the inspiration.  I hope you have enjoyed everything you have seen so far. And we still have one more week to go. 

If you have come from  Lisa's blog, you are on the right track.  If you get lost on the way around the hop check Adeline's blog for the complete listing.

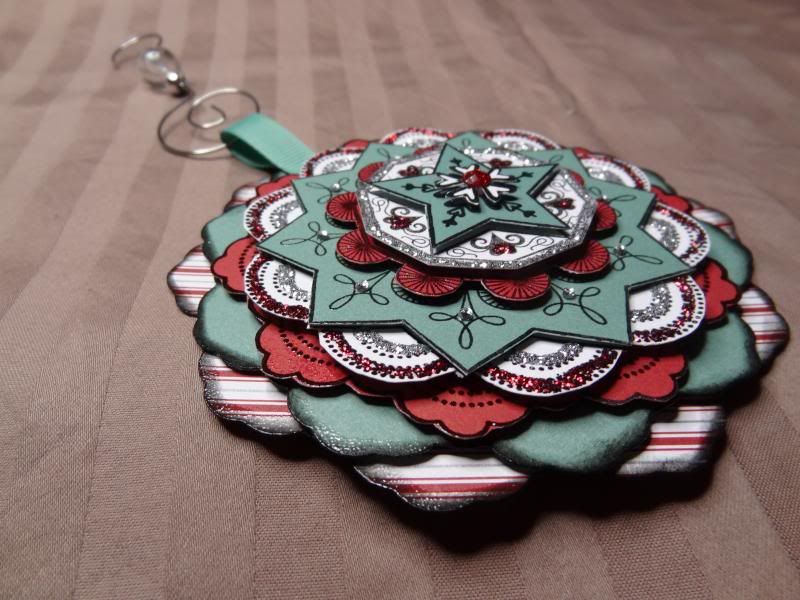
My contribution for this week is a mini-album.


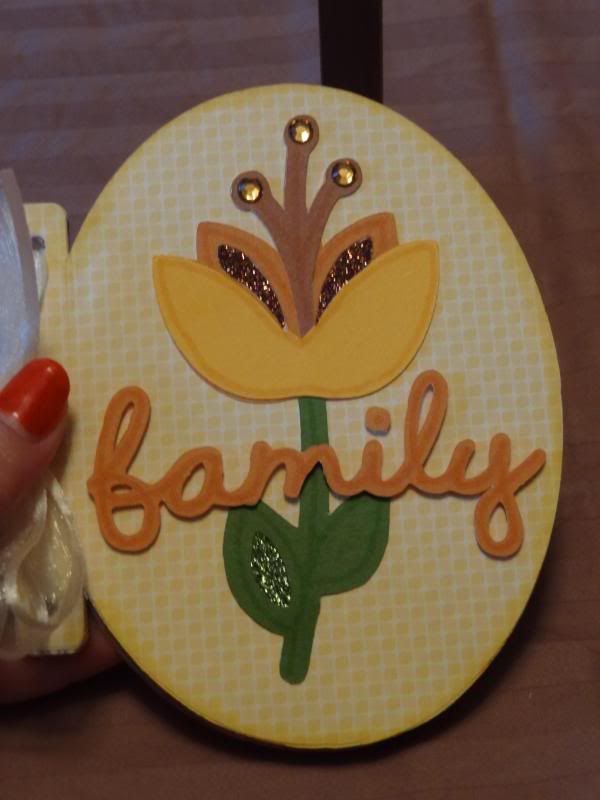
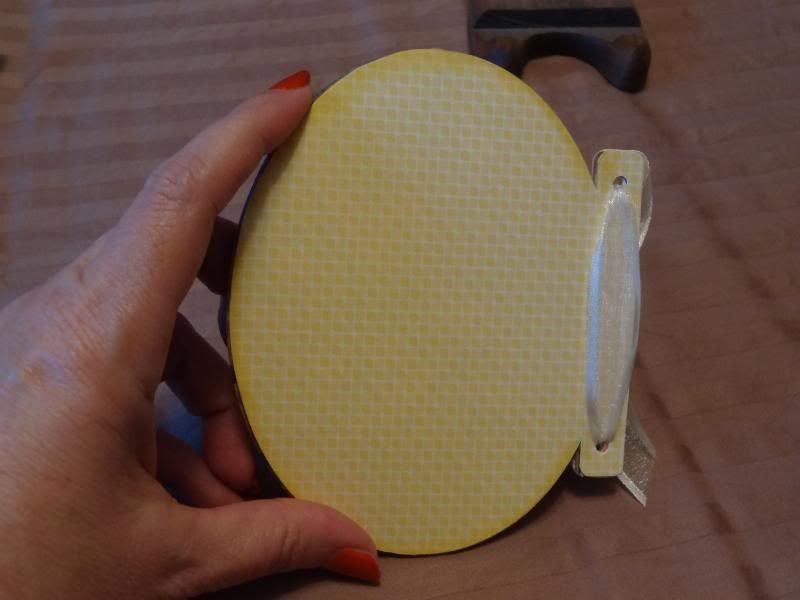
Wait a dog-gone minute, you are saying, there isn't any oval album in Artbooking!  You are right!  This album shape is actually from the round Halloween mini-book on page 54 (Photo Mat 1), altered with the use of the Cricut Craft Room.  The album is sized to fit a standard A2 envelope (4.25x5.5) but I haven't tried to stuff it in one yet.  It is probably too thick, but my intention was to make it mailable, so I intentionally kept to flat embellishments.  The foam tape under the word 'family' and the sparkles on the cover are the only place I went 3-D.

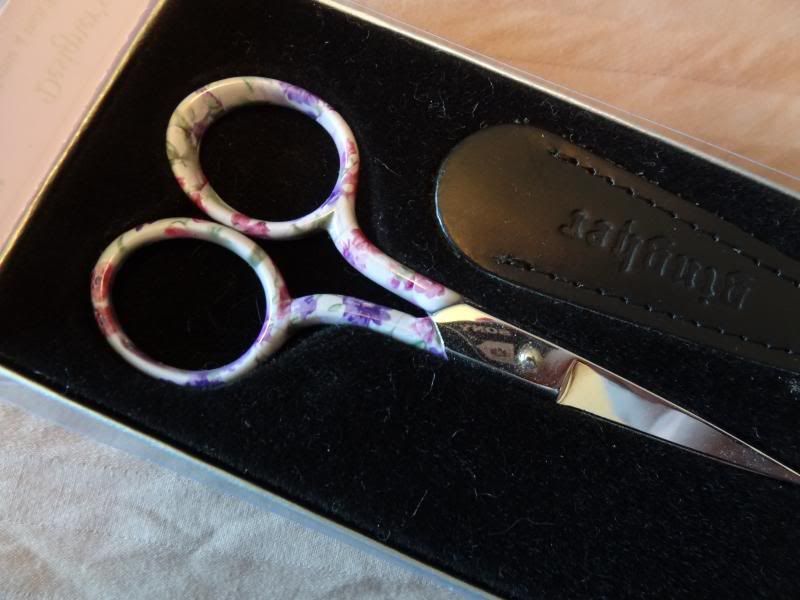
 I have had the Cricut Design Studio for a very long time and have done a lot with it, reshaping, welding, and combining images to make my own designs.  But ProvoCraft (the people that make the Cricut) have decided not to support this rather old software any longer.  In fact my new Expression 2 machine doesn't even recognize it.  So I have begun to explore the CricutCraft Room (CCR.)  This is my first project using it and it was quite easy.  The flower cut and the word 'family' are predesigned images straight from cartridge, sized to fit my album.  I cut the flower 4 times, and cut and pieced them together.  I added Glitter paper from the green (Z1847) and brown packs (Z1830) in the cutout areas and some Sparkles from the Brown and Tan Assortment (Z1753.)  Everything is outlined using our Exclusive Inks alcohol based markers.


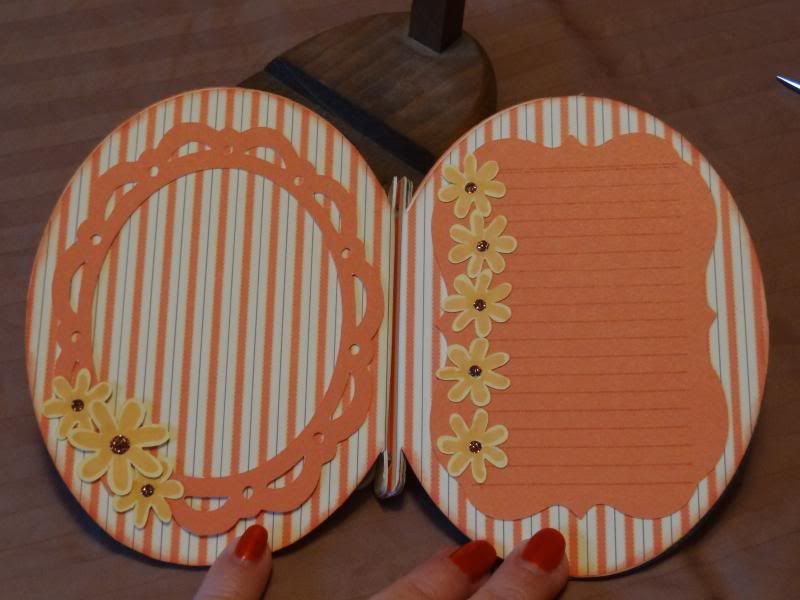
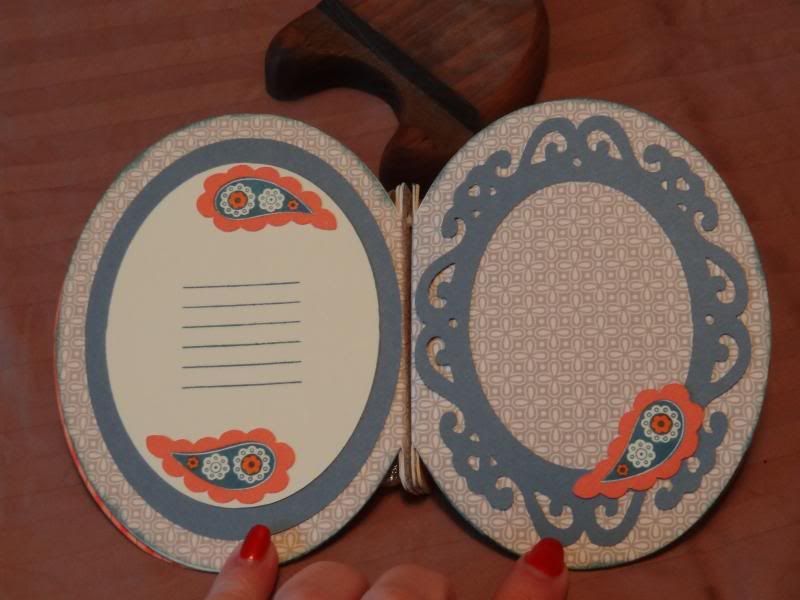
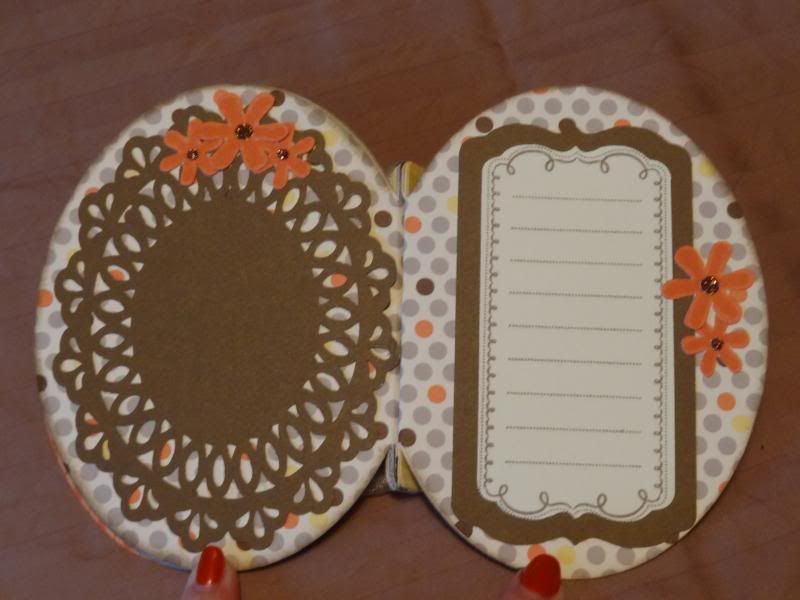
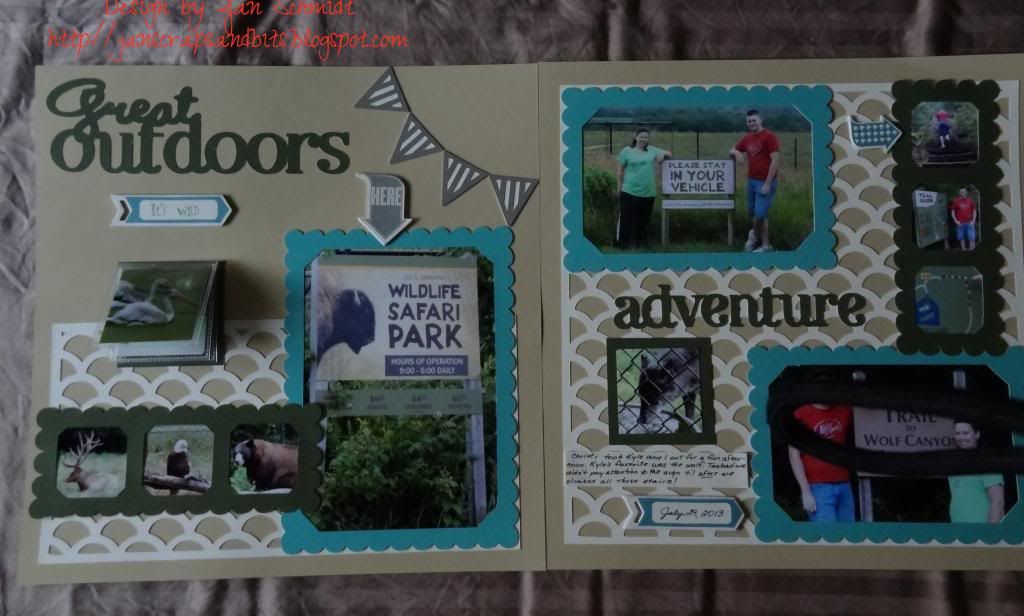
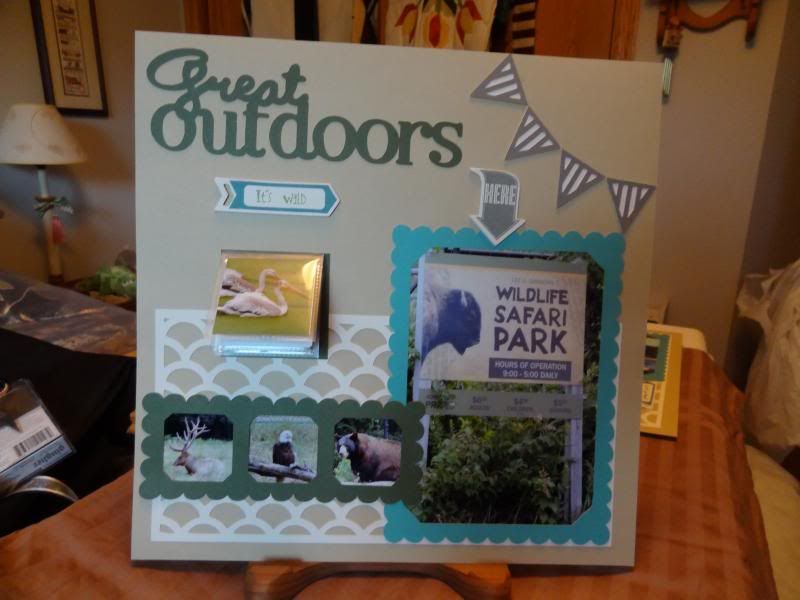
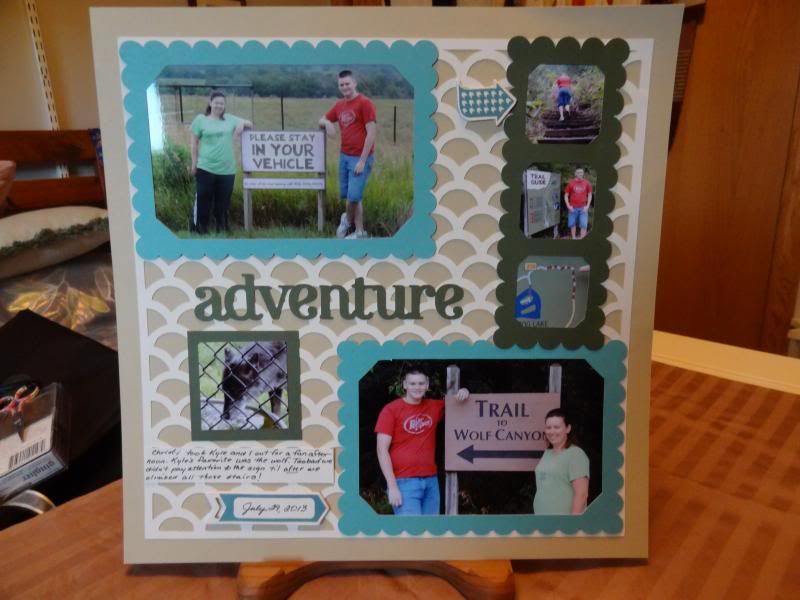
I think I am going to like using the various fancy frames in Artbooking.  I resized 2 of them to fit my little album.  The journaling lines on the right hand page use the notebook paper stamp from the stamp sets that come in the Artbooking package.  I covered the vertical line that makes it look like notebook paper with flowers from the Artiste cartridge..


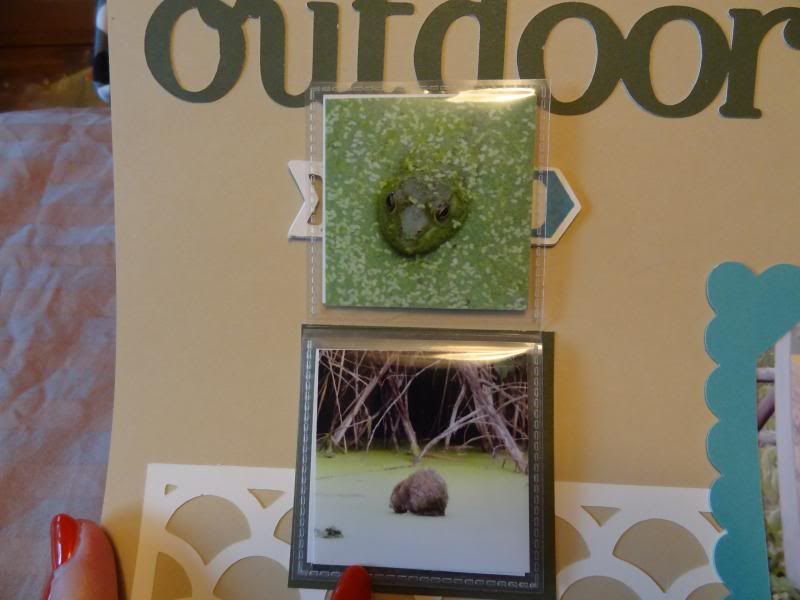
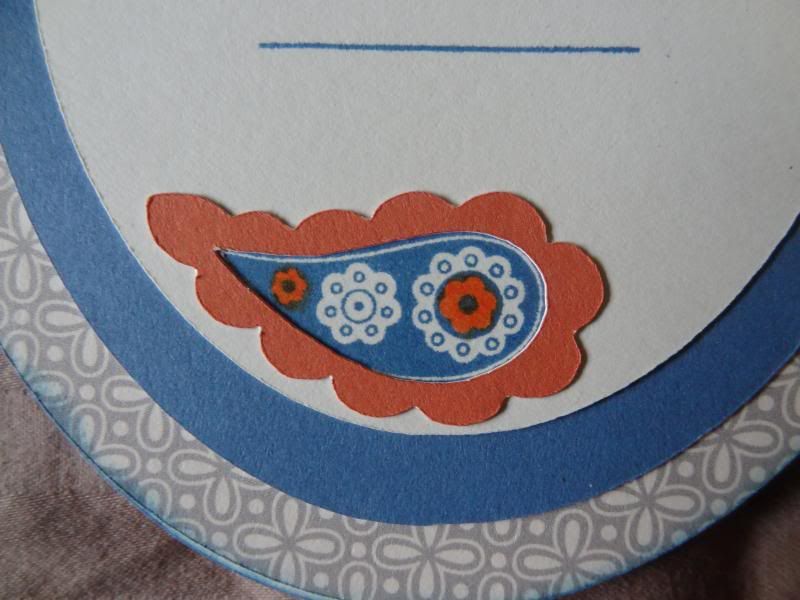
The paisley stamp is from Paisley Perfect C1556.  The Sunset frame for the paisleys is from the Artiste cartridge (Z1790) - page 43 (shift, 1.75 inches)


I hid the inner most cuts from this doily image (one of the functions in the CCR) to turn it into more of a frame.This journaling spot is from the Artbooking stamp sets.


Each page in this little album was cut from Colonial White Cardstock, then cut again from the Babycakes B&T so each page is comprised of 2 B&T layers and one cardstock layer making it a very sturdy book.  The ribbon is retired CTMH.

Now hop on over to Heather's blog to continue on your adventure. And be sure to come back next week for an easy project that I think will be very useful for a lot of us.


Sunday, August 11, 2013

Artbooking in August 8/12


Welcome to Week #22 of the Artbooking in August Blog Hop.  Last week's artwork was so phenomenal and this week over 35 creative consultants are at it again!

Our challenge was to create 4 different projects using the Cricut Artbooking cartridge and any CTMH paper pack.  Our mission was to design each of the following:

1. 2 page layout
2. Card
3. Mini Book
4. Home decor or giftable' item

We were able to choose what to make and when to post it.  This week we will add another great design to the challenge and I am sure you are anxious to see what everyone has created.

Remember this is a circular blog hop and if you get lost or confused along the way, the list is posted on Adeline's blog here.

If you have come here from Lisa's blog you are on the right track

Last week Amy Ulen shared her take on the Pajama Party layout (you can see hers and the original design here.)  This week, I want to show you my variation on that design.


I swapped out the Sweet Leaf elements for Topiary and changed the titles (page 66 in the Artbooking handbook.)


I also added some small Flip Flaps (Z1747)


I absolutely LOVE my camera and how I am able to zoom in on the small details.


I hope you are enjoying all the artwork.  This cartridge has so much potential!  Be sure to come back next week,  I will be sharing my mini-album with you.


Your next stop on our bloghop is Heather's blog.


Sunday, August 4, 2013

Artbooking in August - 8/5


 Welcome to the Artbooking in August blog hop.  If you have come from Lisa's blog
http://lisalynn00.blogspot.com, you are on the right path.


My contribution to today's hop is a card using the 4x6 frame on page 87 of
the Artbooking booklet.  I used real-dial size to shrink it a bit to fit a standard
 A-2 card.  After adhering it to a piece of White Daisy cardstock, I trimmed
the White Daisy to just the size of the frame.  Since the Artbooking cartridge
has been added to the Cricut Craft Room, now I can just 'hide' the inner cuts
and let the Cricut do the cutting work for me.  My card base is from my Spring
/Summer 2013 display board showing a sample of one sheet of the For Always
 paper kit 7165B, still available in the new Autumn/Winter 2013 Idea Book.
 The cute stamped image of a penguin is from the Hostess Rewards stamp set
 C1560 Wintry Wishes.  A bit of (retired) Cranberry ribbon and a couple of
 black sparkles from the Black & Grey Assortment Z1754 and this card
is ready to announce it's 'Warm Winter Wishes' to a special recipient in a few
 months.


Now you can slide on over to Heather's blog http://heatherjanedesign.blogspot.com
for another great Artbooking project.  Remember to come back next Monday
 for another round of Artbooking!


Saturday, August 3, 2013

Almost here

The four Mondays in August are the days for the CTMH Artbooking blog hops.  There will be 40 consultants showing their artwork using the brand new Cricut cartridge.  We will each feature a card, a double scrapbook layout, a mini-album and one other project.   The specific project that we feature on a particular Monday will be up to us.  I have my card, my layout, and my mini-album done.  Only one more project to go.  Here is a sneak peak at my mini-album (hint - it features the Babycakes paper kit.)

One of the new things I learned this week was how to use the Cricut Craft Room.  I have been a long time user of the Cricut Design Studio software so re-sizing Cricut images, welding images together, and using different images together to make new shapes is nothing new to me.  The CCR is pretty much the same thing except that your Cricut machine has to be connected to the computer AND the cmputer has to be connected to the internet the whole time.  Thank goodness that I finally made the time to hook up my new router!  Now all 3 computers in this house can get online.  Anyway this album makes extensive use of the CCR to reshape Artbooking images.  It also uses the CTMH Artiste and Art Philosophy cartridges.

Monday, July 29, 2013

All gone

I have shown you the three double layouts done with the Convention paper kit called Viva.  I finally sat down and made myself use it all up.  Let me clarify here that only the patterned B&T counts (you get 2 each of 3 double sided designs in a kit.)  Usually you have to ADD more cardstock but any scraps of cardstock left are just put away.  Here are the cards I was able to make.


I see that one picture should have been rotated, you will just have to lean sideways to look at it!  The happy birthday stamp shown in the last picture is from the new Autumn/Winter 2013 Idea Book and will be available to order on August 1st.  It is one of 8 new "M" sized mini stamps and each one sells for only $2.95.  That wonderful framed font set will also be available in a full "E" sized upper AND lower case alphabet set for just $29.95.  Our new "E" sized sets now come on two 6x6 carrier sheets and fit in the same size storage envelope as most of our other sets.  The mini's come in cute little 3x3 storage envelopes.

I must say it is a very hard thing to use up all of a pack.  Since our double sided B&T is heavy enough to support photos and embellishments, it helped that one set of the Corporate designed layouts used them.  2 sheets out of 6 used right there.  With everything else I made, I only had 3 tiny pieces left that put together may have equaled one square inch.  Normally I save EVERY little piece but I was comfortable throwing these last pieces away since it meant that this paper kit was GONE.  One down and I'm too overwhelmed to count how many are left, and a bit embarrassed, as well.  Sigh.

Sunday, July 28, 2013

Stitching Progress July 27

Today I opted to play with paper all day at The Crop Room with Jennifer Bennett, another CTMH consultant, rather than go stitch.  But that doesn't mean I haven't made some progress.  I have finished my Small Sampler #4 except for the little woven flowers and one apple that I don't have the right color thread.  I don't like stitching that goes nowhere and these flowers wrap over and under spokes going around and around and around and around...  You get the idea.  So I will order the floss and finish these flowers at home where I can be distracted by the TV.

The Mary Smithies sampler has seen just a little progress, I had to "frog" (rip-it, rip-it) a couple of letters -- a couple of times!

I have added another Thursday project.  It is the Catherine Louisa Chamberlain sampler (1844) reproduced by Threads Through Time.  I don't remember when I started this but I didn't have much stitched.  It is on 25 count linen so will be easy to do at the shop.  I also don't have any idea why I started at the bottom, it is not my usual practice and is a bit more difficult.  This was a kit that included pattern, fabric and threads and there is not a lot of contrast between the thread color and fabric for most of it.  

Well, keep on checking my progress.  I will certainly try to make some!


Saturday, July 27, 2013

Rock, Paper, Scissors

The conversation at the last Thursdays stitch got around to scissors, specifically the Gingher Designer scissors, which are issued a couple of times a year and then the handle design is discontinued.  Mostly, they are named with different girl's names.  They come both as sewing shears for cutting fabric and in 4 inch embroidery scissors.   I have been a collector of the 4 inch ones for several years off and on, especially when I could get them at a local JoAnne's, which has long since closed.  I like to keep a pair of embroidery scissors with each project and my WIP's (works-in-progress) are many!  And I have a stash of scissors still in their boxes, besides.  So yesterday I decided I should try to collect them all and photograph them so I knew which ones I have.  I had the empty boxes plus one lid (now that is worrisome!) and the unopened ones.  I was able to find all but one pair, Amanda.  That one has hot pink patterned handles so it can't be very lost!  In total, I have 14 pairs. I have found 14 other pairs that I do not have.  Since the asking price on E Bay for some of these is in the 3 figure range, I probably won't be getting them!  Here are a few pictures.

                                                                         
                                                 Roberta
Emily
Jamie

Friday, July 19, 2013

Coming in August

Beginning August 1st, I will be participating in a blog hop featuring CTMH's new Cricut cartridge, Artbooking.  So far there are more than 40 CTMH consultants participating and we will all feature a double layout, a card, a mini-album and a home decor or other project on our blogs.  All the details haven't been worked out yet but be sure to check back on the 1st to see some awesome stuff!

Monday, July 15, 2013

My time at Convention

Yes, I am back from Florida and catching up with everything.  I had a great time!  My roommate and I got along well, we spent a lot of time with Shari, our upline, ate and drank (not too much), walked a lot, and learned lots about the new products.  My bundles of goodies have just about all arrived, and almost all of my post convention orders are here or will arrive in the next couple of days.  I have about a mile of the green air bags that came  packed in the boxes for protective cushioning.  Since I don't have a grandchild around for the time being, I have been slowly popping them myself and putting them in with the recyclables. There aren't THAT many left, but there will be more, and more boxes.  Teddy likes both the green bags and the boxes.
.
 

We did 4 different projects at convention.  Close to My Heart designed a paper pack and a stamp set especially and exclusively for Convention goers and gave it to us with the instructions for making two 2-page layouts.  I finished mine up at home (I have found I don't work as quickly in a group but do much better on my own) and I even got the Convention pictures printed and adhered.  Even got the journaling (the bane of my scrapping existence) done for one set!  This first layout has a fold out that holds extra photos.


 For the second set, I am waiting on one more Flip-Flap to finish.  As you can see, Flip-Flaps are the greatest thing for adding photos to a layout.  I will have six photos and my journaling piece in the space of one photo.  You can't see all of it because of the missing Flip-Flap.  (That black loopy thing is the strap of my camera, oops!  I am constantly forgetting to put it around my wrist so it doesn't get into the photo!)  That tall-appearing bird is not all that tall.  He is perched on the edge of a boat that just disappeared into the water color-wise. 


I took the remainder of the paper pack and came up with a third double layout.  I don't have photos on it yet but I really like how it came out.  This is as close as I have ever come to using up an entire paper packet.  I have just enough left for two cards, maybe 3, which I have yet to design.  I wonder if I can force myself to do that before I get started on my NEW Workshops on the Go?   Hmm.


There were 3 other projects but they are with product that isn't available to customers yet so I will wait to post these for another time, but it is pretty generally known that we have a new Cricut cartridge (WhooHoo!)  that will be available to order August 1.  There are many different double layouts where everything is pre-planned for you and several different mini-albums included on this cart.  We made an entire mini-album at Convention and since receiving my copy of the cart, I have made one half of a layout as well as some additional cuts that I used for cards.  Soon I will make the other page to go with this one but for now here is a small sample of how this cart works.  You set the size at 11 inches and everything cuts proportionally to fit your 12x12 layout.  


Isn't it fantastic?  Stay tuned for lots more goodies from our new Artbooking Cricut cartridge!